By default on Netgear MR1100 mobile router doesn’t allow manual band selection / locking on device settings but there is way to add band selection to Netgear via telnet-console.
On this instruction, i use EU-version of Netgear MR100 and firmware version NTG9X50C_12.06.03.00.
Check supported 4G CA combinations on another article.
Access via telnet to Netgear MR1100
To add bands to your Netgear MR1100 device, you must first connect Netgear router to your computer via USB-cable.
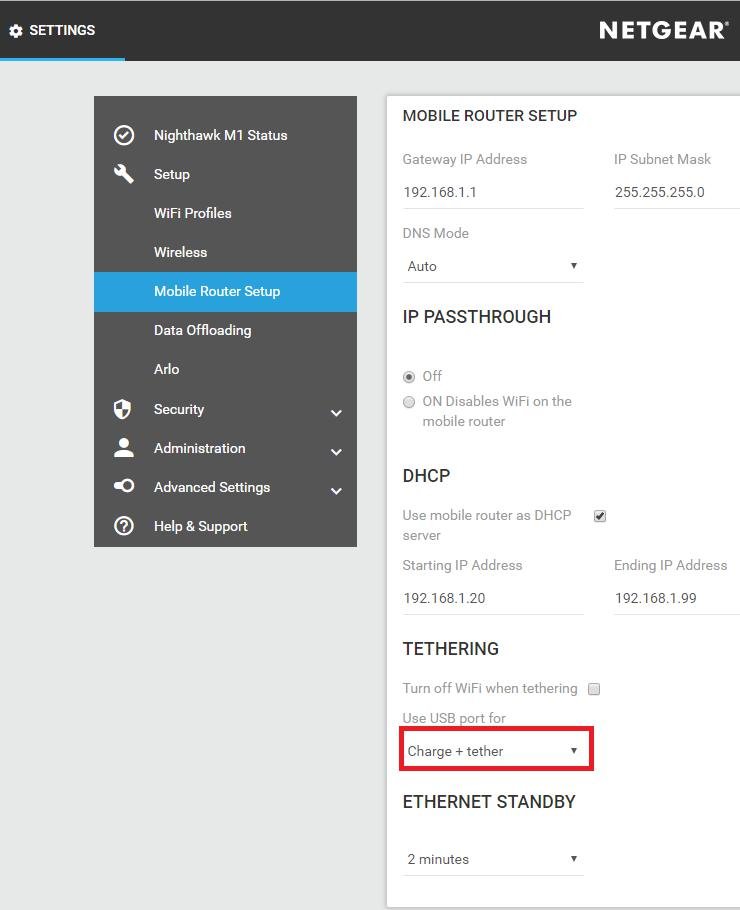
This instruction doesn’t work on WiFi or Ethernet-connection.
Then on Windows use Putty to access router. By default IP-address is 192.168.1.1 and Telnet port is 5510.
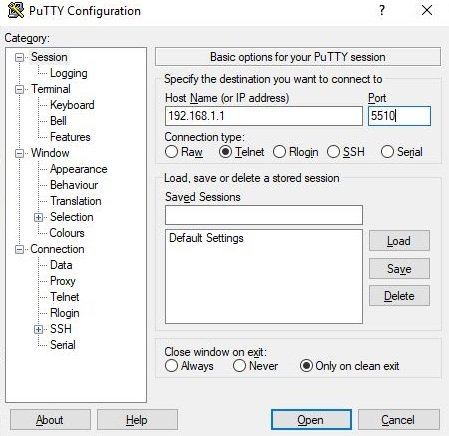
Click to Open to open telnet-console. You should see black area on Putty. Now you can start type AT-commands to console.
Show current connected network information
See active connected mobile network information with AT!GSTATUS? command
AT!GSTATUS?
This command should print something like this
AT!GSTATUS?
!GSTATUS:
Current Time:  740              Mode:        ONLINE
System mode:   LTE              PS state:    Attached
EMM state:     Registered       Normal Service
RRC state:     RRC Connected
IMS reg state: No Srv

PCC:
LTE band:         B7
LTE bw:           15 MHz
LTE Rx chan:      3275
RSSI (dBm):       -48.5
RSRP (dBm):       -75.9
RSRQ (dB):        -9.8
RSSNR (dB):       14
Tx Power (dBm):
LTE Cell ID:      XXXXXX
Physical Cell ID: XXX
TAC:              XXXXX

OK
Show current band selection list and supported bands
Use command AT!BAND=? to see Band Selection list and supported bands of your device.
AT!BAND=?
This command should print something like this:
Index, Name,                        GW Band Mask     L Band Mask      L ext Band Mask
00, Auto,                           0002000004C00000 000001A0080800C5 0000000000000000
01, WCDMA All,                      0002000004C00000 0000000000000000 0000000000000000
02, LTE All,                        0000000000000000 000001A0080800C5 0000000000000000

                                                     0000010000000000 - B41
                                                     0000008000000000 - B40
                                                     0000002000000000 - B38
                                                     0000000008000000 - B28
                                                     0000000000080000 - B20
                                                     0000000000000080 - B8
                                                     0000000000000040 - B7
                                                     0000000000000004 - B3
                                                     0000000000000001 - B1
                                    0002000000000000 - B8  (900)
                                    0000000004000000 - B5  (850)
                                    0000000000800000 - B2 (1900)
                                    0000000000400000 - B1 (2100)

OK
Adding band selections
First, you can only add 8 band selections to device only. That should be normally enough. To add, just run band selection line with copy pasting it to telnet terminal from our site.
Just use same values on AT!BAND=? u see on Supported Bands, just remove 0 before hexadecimal value. If you like try add some combinations, you have to calculate these with NV Calculators.
B1 Selection:
AT!BAND=03,"LTE B1",0,1
B3 Selection:
AT!BAND=04,"LTE B3",0,4
B7 Selection:
AT!BAND=05,"LTE B7",0,40
B8 Selection:
AT!BAND=06,"LTE B8",0,80
B20 Selection:
AT!BAND=07,"LTE B20",0,80000
B28 Selection:
AT!BAND=08,"LTE B28",0,8000000
B38 Selection:
AT!BAND=09,"LTE B38",0,2000000000
If you like remove some of above, please use this command (change number
AT!BAND=<number>,"",0,0
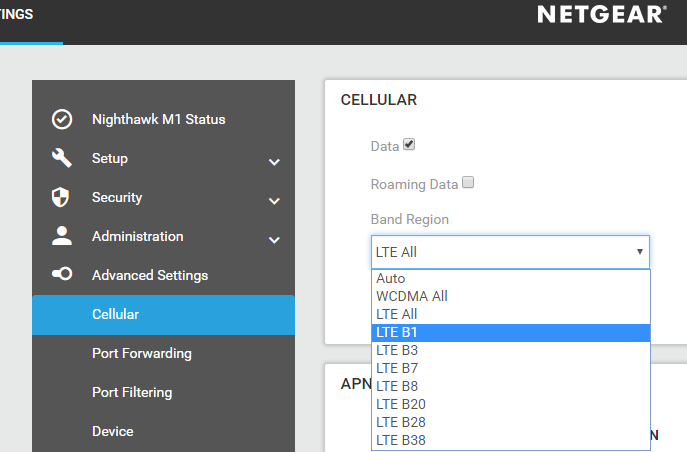
After adding or removing bands on list, you can check list with AT!BAND=? command. You have to reboot your Netgear MR100 to see bands on GUI-interface.
